Wednesday, November 20, 2013

Gluten Free Italian Meatball Loaves

      I love this time of year! The beautiful autumn colors that brighten all the trees in my neighborhood, the crunchy leaves that decorate my front yard and the rainy, chilly nights that call for warm fuzzy socks to keep me warm. In our house this means, a crackling fire in the fire place, a mug of hot cider and good ole comfort foods to fill our bellies! 

      My husband especially loves this time of year, because he knows I'm going to cook one of his favorite dishes. He loves meat loaf! I personally have never been a meat loaf kind of gal. Just the thought of ketchup on baked meat, yuck! (Can you tell I'm not a ketchup fan?) So I of course had to put my own Italian twist on the old fashion America dish and make it gluten free! I hope you enjoy it as much as my family does! 

Italian Meatball Loaves 
Ingredients:
2 lbs lean ground beef
3/4  to 1 cup gluten free bread crumbs * see note
3/4 cup gluten free pizza sauce
1/4 tsp plus a pinch of kosher salt
1/4 tsp black pepper
2 large cloves garlic, finely chopped
1 egg and 1 egg white
1 1/2 tsp Italian seasoning
1/2 cup grated Parmesan cheese

Set aside Toppings
1/2 cup shredded mozzarella cheese
1/2 cup gluten free pizza sauce (warm before topping)

1. Preheat oven to 350°. Mix all the ingredients together very well except for toppings,(shredded mozzarella cheese and 1/2 cup of gluten-free pizza sauce.)
2. Divide and roll meat in to 2-3 inch even meat balls and place into a 12 cup medium muffin tin.  Make sure you fill all 12 cups evenly. You may want to place a cookie sheet under muffin tin just in case of spillover.
3. Bake for about 30 minutes or until meatball loafs are no longer pink in middle, and a meat thermometer reads 160°.
4. Remove from oven and sprinkle on desired amount of mozzarella cheese on each loaf, place back into the oven and continue to bake for about 2 minutes or until cheese has melted. 
5. Remove from oven and spoon on warm pizza sauce. Serve with potatoes and a seasonal green vegetable.


*How to make your own gluten-free breadcrumbs
Take 2-3 slices of  Udi's bread or you preferred bread brand. Toast the bread to a medium - dark, but not burnt. Let the bread cool and place in food a food processor and process till they become fine breadcrumbs. This will make about 1 cup of breadcrumbs.
To make it Italian bread crumbs add 1-2 Tbls of grated Parmesan cheese and about 1 1/2 tsp of Italian seasoning. I usually triple this recipe and freeze what I don't use up to 3 months.

Why the pizza sauce and not regular tomato or spaghetti sauce you ask? Pizza sauce gives it a little bit more spicy kick to it, without displeasing the kids sensitive pallets, and the more you read, the more you'll find out that I'm truly all about spice! 

Spicy Mamma signing off!  ;) 


Sunday, November 17, 2013

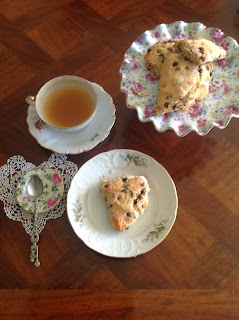
GlutenFree Amaretto Chocolate Chip Scones

          We are currently studying the great Charles Dickens and the wonderful story, A Christmas Carol. Tomorrow our  homeschooling co-op will be doing a Victorian age tea with the kids. The kids will take turns being servants and sophisticated aristocrats of the Victorian age, which of course calls for something yummy to eat. So I set out to make scones. My friend Cher, from Aunti Gluten's Barkery, once told me, "If your going to make scones, make them with the GF Bisquick mix." And I did.

*Side note, the M’lis Vanilla instant meal, I love this product. It is a gluten, lactose, soy, sugar, artificial sugar free product. It is sweet and yummy, and we have tried many protein flavored powders, which were all gross. This one is by far the best! I use it as an extra meal of protein for my picky eater, who is a carb fanatic. Shhh! She just thinks it's vanilla milk! They have chocolate too.  : ) 

Where to buy M’lis..
http://alternativehealthspas.info/products/vanilla-cream-organic-instant-meal-replacement-shake

Gluten Free Amaretto Chocolate Chip Scone ~ Lactose, Egg, Soy, and almost ;) sugar free!
Ingredients:
• 2 1/2 cups Bisquick Gluten Free mix 
• 1/2 cup M’lis Vanilla instant meal, (this is why you will need no sugar, it is naturally sweet, have I mentioned yummy too!?)
• 3/4 cup mini chocolate chips (I use dairy free, soy free, gluten free Enjoy brand chocolate chips)
• 1 1/3 cups almond milk 
• 1 teaspoon gluten-free almond extract (I use Flavorganics brand)
Directions:
1. Heat oven to 400°F. Line cookie sheet with cooking parchment paper, (I also used stoneware).
2. In large bowl ( I use my KitchenAid with the flat beater), mix 1 1/3 Almond milk and 1 tsp almond extract. Slowly pour in and mix 1/2 cup M’lis Vanilla instant meal, and  2 1/2 cups Bisquick Gluten Free  until dough forms.
3. Use a spoon and fold in 3/4 cup mini chocolate chips.
4. Divide dough in half. On surface sprinkle sorghum flour, pat each half into a 6-inch round. Cut each round into 6 wedges. I used a knife with sorghum flour sprinkled on it to make cutting the dough easier. Place wedges 2 inches apart on cookie sheet.
5. Bake 12 to 14 minutes or until golden brown. Cool 5 minutes; remove scones onto cooling rack.
 Serve warm with a hot cup of tea!
My girls loved them and my husband too, who never liked scones before! I love the almond flavor, it really popped.  If you have an allergy to nuts, switch up the almond milk for rice or dairy and the almond extract for vanilla extract.

ENJOY!


Tuesday, November 12, 2013

Could there be a link between your child's learning disabilities and their diet?

"My belief is now -- and there is very good evidence for this -- is that the brain and the associated nerves are the number one site for gluten related disorders." 

Dr Rodney Ford     http://drrodneyford.com/


Could there be a link between your child's learning disabilities and their diet? Is it quite possible! There has been studies that have supported food allergies and a link to neurological disorders. Consider taking a closer look at your child's diet. Could the 8 common allergies be the bad guy? I often tell my sweet girl when she wants to indulge in food that is knowingly bad for her body and mind. "That food makes you go Kookoo for coco puffs, we don't want that, do we?"

She usually will tell me "NO!" And look for something else. Kids learn to listen to their bodies. You will be surprised at them when the light bulb goes on and they reject the food that is like poison to them. The human mind and body wants to be healthy, even if they are Nine years old!


8 Common Food Allergens 
  • Milk
  • Eggs
  • Peanuts
  • Tree nuts (such as almonds, cashews, walnuts)
  • Fish (such as bass, cod, flounder)
  • Shellfish (such as crab, lobster, shrimp)
  • Soy
  • Gluten (Wheat, rye and barley)
Here are a few articles that support links to gluten and neurological disorders ... 

Friday, November 8, 2013

GLUTEN SUMMIT

THE WORLD’S FIRST GLUTEN SUMMIT
COULD CHANGE YOUR LIFE!

Dr. Tom O’Bryan of theDr.com has gathered 29 of the world’s experts and opinion leaders on the topics of gluten-related disorders, nutrition and healthy living for a series of online interviews taking place for FREE from November 11-17, 2013.


During the summit, you will:
  • Learn about the latest research on gluten-related disorders;
  • Understand why we MUST call more attention to them;
  • Gain improved knowledge of proper diagnosis/treatment methods;
  • More frequently ask, “Could this health issue be due to gluten?”

The goal of The Gluten Summit is to shift the scientific discussion and clinical recognition of gluten-related disorders forward by five years. Meaning, we want the conversation between patients and doctors that will be happening five years from now to happen now.


http://theglutensummit.com/

Wednesday, November 6, 2013

Tips and Tricks for the Dyslexic Reader

I thought I'd Get off the gluten-free kick for a moment and show you some tips and tricks that I use to read with my dyslexic child.

The other day I had someone tell me how it's not good to label our children. Yet, society labels everything!

 "Don't label your child dyslexic, that will just hold her back."

But my philosophy is, if you label something then you can identify the problem areas and use tools and wisdom to help overcome that label. I happened to be a label over-comer myself. I am a successful homeschooling, stay-at-home mom, who also teaches homeschooling classes on the side, and diagnosed my own child with Celiac disease, (not the doctors.) I managed not only to figure out Gluten Free dietary issues, but also food coloring, soy, and other things that made my kid go cuckoo for cocoa puffs. And I did that, all while being labeled dyslexic. 

Now although the two of us are dyslexic, and we can sometimes struggle, that is no excuse to fail. I don't allow her or myself to use that as a crutch. Nor do we use the words "I can't." We are allowed to say things like "I'm struggling right now," or "this is difficult," but the phrase            
 I can't shouldn't be in our vocabulary, because God made everyone smart, we all just tick in different ways.

So on that note, I thought I would share with you some the things that I do at home to help my girl stay on track with reading.

First off I took her to the eye doctor and had her eyes checked, I speculated that she might need them. It turned out that she did need reading glasses, so we took care of that, and it has made a little bit of a difference.

I happen to have a snug-a-bug, who loves hugs and kisses and to be held constantly all day long. How does that work when you are homeschooling? Well when it comes to reading we both sit in the same chair. I sit behind her, while she kind of sits on my lap. I take my left arm and I wrap it around her, weighing her down, (remember she is ADHD and sitting still is very difficult for her.) 
You might say that's a little helicopterish mom of you. Lol! However she loves it! If I don't have my arm around her or even on her shoulder, she is not comfortable reading and she will often pull my arm back around her. This actually is a really great thing when you're dealing with an ADHD child. But it also helps a dyslexic child, it makes them feel secure because you are so near, right there helping them.


The next thing we do while reading is use a pointer, we use a princess wand, cause after all she's a princess ;). 
I hold the pointer and point to the words she needs to be reading. If we come across a word that she has miss read, I tap the word silently ( letting her know that she needs to retread it.) If I do have to say something, I try not to use words like, wrong or no. Rather I say, " try again" or "sound it out." I often have to redirect her to the first letter in the word. I do my best to use positive words that encourage her to know that she is more than capable of reading it. 


Other things that I have use to help her stay on track are colored layovers and a 3x5 card marked with a highlighted line. She also loves reading to her dolls, so I always allow one stuff toy or doll at the table that she reads to. 


We have a reward system in play as well. Kids need instant gratification. Every time she reads to me she receives a star. We read 3 times a day. Once she gets a total of 12 stars, she gets to pick from a list of prizes. So every couple of days she is being rewarded. I do this on purpose because I want her to love reading and love the rewards that she gets from reading. Right now the reward is tangible but later in life she will gain the knowledge and the imagination from reading and it will be a rewarding itself.
Example: 
30 min of TV
Face painted
Frozen yogurt
Prize from the prize box $1 store items
Video game time etc.

There are lots of different ways of helping your child, you just have to find the right niche that works for you and your child, so don't give up,. Just keep reading!

Thursday, October 31, 2013

Pumpkin Dutch Babies


  • Today is Halloween!!! And in our house that means all things pumpkin and/or orange. All of our meals have something with pumpkin or the natural color of orange in it.

  • On the menu today is pumpkin Dutch babies for breakfast served with persimmons and orange juice. For lunch we will eat carrots and have peanut butter and orange marmalade sandwiches. Dinner is my most favorite! We will be devouring macaroni and cheese (my personal recipe I'm not ready to put online yet.) The only thing is our macaroni will not actually be orange since we do not use cheese that is colored. ;) After dinner we will carve our pumpkins to look silly and head out the door for a fun night of "Trick or Treat".

  • Before the sun came up, I slaved about (not really) in the kitchen to create for Dorthy, Toto and my hungry Pioneer, Pumpkin Dutch Babies. Super easy and quick. Just a few extra steps added to the Dutch Baby recipe. 
  • The vote, unanimous, We Loved it!!! Hope you do too!

  • Pumpkin Dutch Baby Pancakes 

  • 1 C. Organic Almond Milk
  • 1 tsp Gluten Free Vanilla Extract
  • 4 Lg. Organic Range Free Eggs
  • 1/2 cup Organic Pumpkin Purée 
  • 1/4 tsp. Kosher Salt
  • 1/4 tsp Cinnamon
  • 1/4 tsp Pumpkin Pie Spice
  • 2 pinches of Nutmeg
  • 1 C. Gluten Free All-Purpose Flour  ( I used Trader Joe''s Gluten Free Brand)
  • 2 Tbsp. Butter
  • Maple Syrup or whipped cream and powder sugar

Preheat the oven to 425 degrees and make sure the oven rack 
is in the middle space. Whisk almond milk, vanilla, eggs, 
cinnamon, pumpkin pie spice, nutmeg and kosher salt in a 
medium size bowl. Vigorously whisk in the flour , putting in a 
little at a time until smooth.
Melt 2 Tbsp of the butter in a 10-inch cast-iron skillet over
medium heat until the butter is a light golden brown, and 

remove from heat.
Pour batter mixture into the melted butter skillet. Put the
cast-iron skillet into the oven and bake until  golden and puffed 
up, about 25 minutes, I cooked this slightly longer than the 
regular Dutch Babies since I added another wet ingredient. 
Be careful not to overcook. You don't want dried out egg!
Remove from oven and serve immediately. Serve with maple 
syrup or whipped cream and powder sugar.

Have a Happy and Safe Halloween!


Tuesday, October 29, 2013

Pumpkin Pie Oatmeal

          Yesterday in the mail my daughter received her monthly subscription of Clubhouse Magazine by Focus on the Family. As she flipped through the pages she came across a recipe called Pumpkin Pie Oatmeal. Bright and early this morning Jordan says, "Mom, please oh please, will you make us some pumpkin pie oatmeal." This recipe of course is intended for the day after Thanksgiving and calls for left over pumpkin pie, which has gluten in it. 
        Sure I can just go to the store and buy a gluten-free pumpkin pie, ready-made at Safeway. Oh, wait, no, no I can't. You’re supposed to take the left over pie, crumble it into your oatmeal and WhaLa pumpkin pie oatmeal. So unless I make a gf one from scratch and then toss it into the oatmeal… well, umm, no, not gonna happen!!! I don't have the time for that. Besides that's a lot of sugar for breakfast!
         Don't get me wrong, I'm crazy for pumpkin pie it is my favorite food for Thanksgiving, okay I love the turkey and gravy too. Oh the gravy, I will save that for another day. Since pumpkin pie is so fantastic, it usually doesn't even make it to the next morning anyways. "Ok I will make you pumpkin pie oatmeal for breakfast," she of course was thinking later in the week. 
          But to her surprise... I went to the pantry to gather all the perspective ingredients. Hooray! I actually had everything I needed. This was one of those days I enjoyed making a recipe on the fly, (don't worry an old lady didn't come and swallow it.) Putting all the ingredients together was simple; making it taste right, was another story. Ummm, crust for the small crunch, whip cream, and the flavor of rich pumpkin pie all wrapped in hot breakfast oatmeal but without all the sugar. After giving it a test I got three thumbs up, hubby didn't have any L. He was in a hurry to get to work. We girls loved it! I hope you do too! Happy Autumn! 
   
Pumpkin Pie Oatmeal
Ingredients:
2 cups uncooked whole oats oatmeal
4 cups Water  (Cook oats as directed)
½ cup Canned Organic Pumpkin Puree
½ tsp. Cinnamon
1/8 tsp. pumpkin Pie Spice
A few pinches of nutmeg
3-4 Tbsp. Brown Sugar  (shh. I only used 3)
½ to ¾ cup Almond Milk
1 cup Organic GF Granola (Pumpkin if you have it)
Whip Cream

Directions:
 
Cook oatmeal as directed. (Shh! Don't tell anyone but, I cheat and use the microwave to heat my oatmeal, the stove takes too long.)  
After warming up for about 3 to 6 minutes, stir in all ingredients except for granola and with cream. Heat up oatmeal for another 2 to 3 minutes. When your oatmeal is fully cooked sprinkle on gluten-free pumpkin granola and top with whip cream. 
The granola gives it a great crust-like crunch and the whip cream makes it really seem like pie!
Enjoy ~ xoxo ~V


Saturday, October 26, 2013

Valerie's French Toast Substitute

    •  Every Saturday morning I get up and make waffles, pancakes, bacon, sausage and cut up fruit in bulk for the up coming week for my family. Two birds, one stone. Working hard today, so I don't have to put a lot of effort into making breakfast during the weekdays, everyone's bellies are full and ready for their day. I mix up my own waffle/pancake mix myself, using about 5 different flours. I don't keep a box mix in the house, because my family doesn't like any of them, except for one brand that cost a whooping $8 a box and only makes about 5 waffles. This morning I set out to make my bulk breakfast, only to find I didn't have enough flour to make even one batch of pancakes. Didn't matter much any ways, I wasn't in the mood for pancakes or waffles, I had a hankering for French toast! 

    •  French toast is my most favorite breakfast of all breakfasts. Of course I love French bread too and miss it very much, (Especially with a good cheese and Salami!)  Making French toast from a left over loaf was the best. With gluten free, there really is no (In my personal opinion,) decent substitute  for French bread or French Toast. In the past I had made French toast with name brand gf breads and homemade gf breads, none of them pleased me, they are so dense, that it is hard to enjoy them. But I do make them for my girls, they like it. "Man!" I didn't have enough bread either. So I thought I give Dutch baby pancakes a try. I scanned the web for recipes, they all call for cows milk, which I don't buy. I also didn't have some of the other ingredients that it called for either. Why my pantry was so bare this week, I don't know? What to do, What to do? Make it up from there! And I did! 

    • After quickly whipping up the ingredients (having exactly 1 cup of gf all purpose flour,) I patiently waited for it to cook. Uncertain how it would taste and even more unsure if the flour would cook through correctly. Ding! I pulled it out of the oven and was amazed how yummy it looked! (That's when I should have taken the picture.) When I tried it, I thought... Wow, super yummy, this taste like French Toast! My family gave it 4 out of 4 stars. Sydney said, "Amazingly Good mom!" and Jordan gave it two thumbs up and mumbled with food in her mouth " Yummy!"

    • Here it is,  my version of Dutch babies, which is now my substitute for French toast. It is also great for my Candida friends, because there is no yeast in them. Hope you enjoy! xoxo~V

P.S. I think next weekend, I'm going to try and make them Pumpkin flavor ;0). Happy Fall!

  • Valerie Dutch Baby Pancakes 

  • 1 C. Organic Almond Milk
  • 1 tsp Gluten Free Vanilla Extract
  • 4 Lg. Organic Range Free Eggs
  • 1/4 tsp. Kosher Salt
  • 1/4 tsp Cinnamon
  • 1 C. Gluten Free All-Purpose Flour  ( I used Trader Joe''s Gluten Free Brand)
  • 2 Tbsp. Butter
  • Maple Syrup 

Preheat the oven to 425 degrees and make sure the oven rack is in 
the middle spaceWhisk almond milk, vanilla, eggs, cinnamon and 
kosher salt in a medium size bowl. Vigorously whisk in the flour, a
 little at a time until smooth.
Melt 2 Tbsp of the butter in a 10-inch cast-iron skillet over 
medium heat until the butter is a light golden brown, and remove 
from heat.
Pour batter mixture into the melted butter skillet. Put the cast-iron
skillet into the oven and bake until  golden and puffed up, about
20 to 22 minutes. Be careful not to overcook. You don't want dried
out egg!
Remove from oven and serve immediately. Serve with yummy fruit
and drizzle with maple syrup.


Wednesday, October 23, 2013

Gluten Free Bakery


One of our Families favorite destinations.....

Gluten Free Cakes, Cookies, Cupcakes & More.

4290 Stanley Blvd  Pleasanton, CA 94566
(925) 639-9977

My favorite is the Chai Cupcake with Cream Cheese frosting! Yummy!
Gluten free cupcakes

Homeschooling a Dyslexic, ADHD, Celiac kid. Not So Hard! Continued, our story...

Homeschooling a Dyslexic, ADHD, Celiac kid. Not So Hard! Continued, our story...
 (Continued from May's Archives)


...And from the very beginning I knew there was more than just tears at preschool. I knew she was dyslexic! The roller coaster just got stuck upside down! 

   So you may be asking how could I possibly know at 3 she was dyslexic. We'll let me debunk that fact that dyslexia is just switching your b's and d's around, there is so much more to it than that. Below a few clues are mentioned. For starters we had a hard time with all of the alphabet, numbers and shapes. Colors weren't a problem. 

      Hold on, hold on, let me back the roller coaster a little bit. As a baby she often had chronic ear infections, a runny nose, a gassy tummy, and was very quiet. ( I know those of you that know her, could probably never imagine her as a quiet girl, but she was, unless she was agitated, then she fussed.) She rarely talked actual words. Since my background was in American sign language, I taught her key words that she often communicated with me. It concerned us that she didn't speak, she has a cousin that was born deaf and we thought maybe she could be too, or hard of hearing. So at 15 months we went to an ear specialist and it turned out she needed tubes in her ears. Well, when the doctor completed the surgery, he reported to us that she had more than 6 inches of yucky gunk infection compacted in her ear. He also let us know that she wasn't hearing correctly, because of the compacted gunk she was hearing like she lived under water. (This may explain her fascination with mermaids, LOL!) 

      What does this have to do with dyslexia, well I will tell you. First off,  it put her behind understanding audible language. The first two years of a child's life,  hearing words is so very important. She needed to be gathering words in her word bank, for all of the 15 months, but instead it was only visual information that she gathered,       (Can you guess her learning style?) After her surgery she began to hear, however, if we were to compare her to the average 15 month old she was extremely behind. Words were new to her. After the surgery a "whole new world" opened up to her ;)  She could hear, more important she could hear her own voice. (Our house became a much louder place.) At this point she often said things wrong. We thought nothing of it at the time. We thought is was cute! For example; she often said "whoop cream" instead of whip cream. No matter how often we corrected her, she always said "whoop cream" she still says it, but it's to get daddy's attention to squirt some in her mouth for fun. Clue #1.

      Anyhow, this part of the story alone, should tell the tale of the possibilities that there could be future problems.

      Moving on! So fast forward to preschool drop out, LOL! She spent 1 and 1/2 years in preschool before I pulled her. Even the head teacher, whom we all loved, noticed her lack of abilities that her peers were accomplishing, from letter recognition to cutting and fine motor skills. At home we began the frustrating task of learning our ABC's and 123's. Oh! It only took 2 and 1/2 years for her to get the letters, sounds and to write. Often with tears. Clue #2.

To be continued... must make dinner and other chores, talk to ya later gator :) 
xoxo ~ V


Here are some websites that list characteristics of dyslexia.

37 Common Characteristics of Dyslexia                                                         http://www.dyslexia.com/library/symptoms.htm

Dyslexia: Symptoms & Solutions What is Dyslexia?
http://www.bartonreading.com/dys.html#signs

Subscribing

Leaving comments :
All my wonderful friends are asking me how to leave comments, I believe you have to hit the no comment button and a box will appear for you to leave your comment.

Subscribing:  A few of you are asking how to subscribe; at the bottom of the page there is a box that say " follow the adventures by email," you put your email in and follow the instructions from there.

I believe you have to be a subscriber as a Google user in order to leave comments or subscribe.

Thank you all, I have been flooded with lots of email with all your wonderful support I just want you to know I really appreciate you all! ~ V  

Tuesday, October 22, 2013

Gluten Free Crêpes with a Latin Twist!


Gluten Free Crêpes with a Latin Twist! 


        So in the almost three years of being gluten free, I would have to say I miss my flour tortillas the MOST! Being part Puerto Rican I have a need for my breakfast burrito!!! And frankly it doesn't quite taste the same with corn tortillas! I absolutely hate the GF flour style tortillas, yuck! (Can we say card board!) But until there is a better one out there, I had to find something to get my burrito fix, so I came up with Crêpes with a Latin Twist!


Ingredients:

Gluten-free crêpe mix
Ground sausage ( I used sage flavor)
Potatoes O'Brien (already has bell peppers and onions in it ;) yum)
Cheddar cheese   ( I use dye free, organic to eat, in the picture I used yellow cheese for effect )
Tappatio hot sauce (optional, but necessary on my plate)
Chopped Cilantro

Cook GF ground up sausage, potatoes O'Brien, 
stir in the chopped cilantro and set aside. Cook your crêpe as directed, add your burrito ingredients including cheese into crêpe, top with more cheddar cheese, cilantro and hot sauce (optional.) Now you don't need to scramble eggs or need a flour tortilla, great substitute if you miss those spanish burritos for breakfast!
Replace , Make, ENJOY!


Gluten Free Erupting Volcano Cake


Gluten Free Erupting Volcano Cake 

see Junes post for directions 

Yes, yes, I know not dye free, I made an exception this time.


Construction

Thank you for your patience, this blog currently under construction as I am new to this blog thing.. And I'm trying to figure out how I can include ADHD, dyslexia, homeschooling, and celiac disease all-in-one blog! Please be patient with me as there is more to come including more of our story and recipes.

<3    Oh yes and if you love the Ramona Quimby books, then our story is for you! Because I have an adventurous, imaginative Romana myself that goes by the name of Sydney!      <3

Saturday, June 1, 2013

Volcano Cake Recipe


Valerie's Volcano Cake 
I made this cake GF. I Would not recommend the brand of gluten-free cake mix I used. Very heavy. 

Ingredients needed:
3 Boxes of cake mix (I did yellow) + baking  supplies
3 room temperature chocolate frost (I used dark chocolate)
1 Tube Wilton's Sparkle Gel, Green sprinkles, Water
Dry ice, Bunt pan, Pyrex bowl that is oven safe
Pom juice glass (Pomegranate Juice sold at Safeway)

How to assemble:
Make 1 3/4 of box cake batter, put in bunt pan and cook according to directions, you will have to cook longer if adding extra mix.
(Gluten Free mixes don't rise, that is why extra batter is required) 
I used my Pampered Chef mixing bowl with a Pom Juice Glass in the middle. Grease all pans and glass jar. Place glass in middle of glass bowl. Make sure your mixing bowl can be used in oven and high temperatures.
Put 1 1/4 of box cake batter in pyrex bowl with glass (creates instant hole, no cake wasted)  and cook according to directions, you will have to cook longer if adding extra mix.
Let cool.  I then sliced the bunt pan cake length wise and frosted in between each layer, I then removed the Pom glass, hole already created.  
 I then sliced the pampered chef cake length wise and frosted in between each layer. Stacking each layer and frosting the whole cake. 
I put the pom glass in the center of the cake, I used a fork to score the frosting to look like rough terrain. I also frosted the rim of the glass to hide the fact that the glass was higher than the cake. 
I took the red gel and made it look like lava oozing Down. I sprinkled green around the bottom because my daughter said it needed grass at the bottom. 
When ready to serve poor some water at the bottom of the jar. Use plastic tongs to gently place dry ice in cup. And now you have a cake that will make your kids squill with joy and say "I have the coolest mom in the whole world" my girls sure did! 

Enjoy!